Depth of Field - Hunting Photography Series - Part 2
Part 1 - Depth of Field - Hunting Photography Series
We went through a 30,000 foot view on how to make your hunting photographs better, but as often happens with just a cursory look the basics are learned but the need for in depth detail is a must to fully understand and be able to implement it.
I will be doing a blog series on upping your game when it comes to taking great images while out in the field. Whether you’re an upland hunter, bowhunter, big game hunter or somewhere in-between, this series will help you take your photos to the next level. It doesn’t matter if you’re trying to beef up that family photo album or trying to work your way into sponsorships through Instagram.
A fully manual camera, preferably an SLR or one of the mirrorless variety will be crucial in order to obtain these types of photos. You can find my Camera Gear list here. This is just what I use, any of the major camera brand companies make amazing equipment and will work just as well.
Depth of Field
Mastering this technique of depth of field is a must for any budding photographer. Spend the time to learn this and you will take your photos from so-so to wow, just like that.
You may be asking yourself what the heck is depth of field and why the hell do I care? That’s a fair question. I’m going to keep it simple and in layman's terms to that you don’t just skip over this one and move on to the next, it’s that important!
What is Depth of Field?
Easy. Depth of field is how large of an area (from the nearest object to the furthest) is in focus within the image.
OK. So that made no sense right? Reading it is one thing, seeing it is another.
Take a look at these photos. They’re different right? They’re not. Well at least the composition hasn’t changed at all, but rather the depth of field.

Great Depth of Field
You see how everything is in focus? Everything is crisp and pretty much everything in the shot catches your attention just about the same.

Shallow Depth of Field
Now the second image, what’s different about this one? One object is in focus and everything else gradually blurs out as it gets further from it. Where is this forcing your eye?
Why and When to Use Shallow or Great Depth of Field
You’re going to start to notice something about all of these tutorials if you haven’t already. I will always be asking “why” we should do something. That is because great pictures rarely happen by accident. They are considered thoughtfully beforehand and then executed.
Shallow Depth of Field
So let’s start with shallow depth of field. When you make a spot of your choosing in focus and have the rest blurry, this forces the viewers’ eyes where you want them to be. It clouds out the insignificant elements in the photo and allows whatever you choose to be the important focus of the shot.
It keeps objects from blending into the background. It makes them stand out and be the hero of your story.
You often want to use this when you are taking a picture of a hunter and trying to relay emotion. His face is what matters and what it is saying, so make that the primary focus through a shallow depth of field and let the background become secondary.
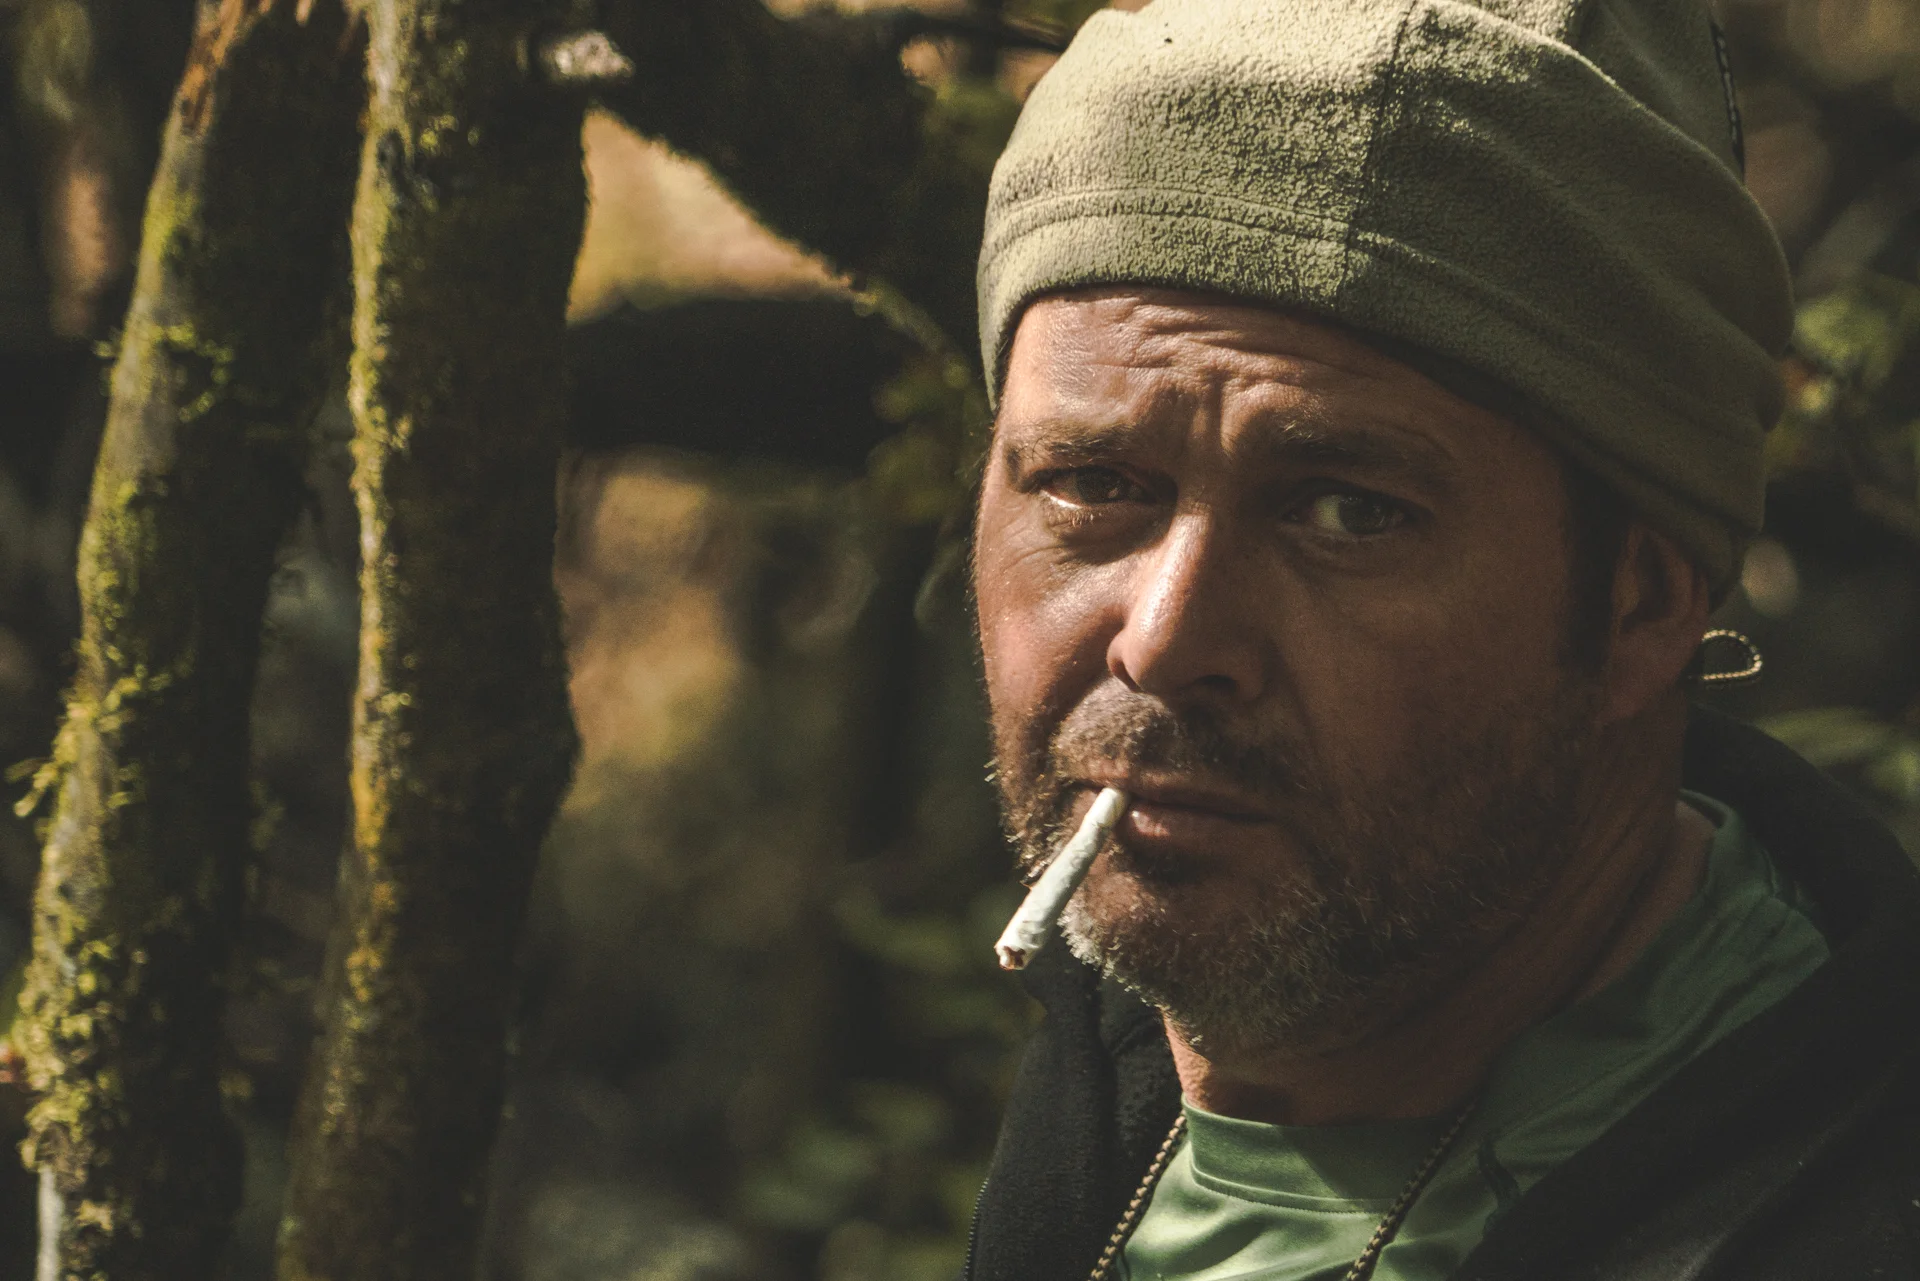
The eyes are telling the story here. All other elements are just there to solidify the subject into a setting.
How about that monster 4x4 mule deer you just shot, but it happens to be next to the sewer treatment plant? Not something you’re particularly looking to advertise. Use a shallow depth of field to make your trophy shine and turn that bucket of turds in background into a cool textural element.
Maybe you want to show off the cool new broadhead you’re trying out. Sure you want to see it on the rest along with the rest of the bow as well as the hunter. But the broadhead is the subject right?

The shallow depth of field in this picture is forcing your eye to look where the photographer wants you to look.
Put that in focus and let the rest fade away into a soft blur. We still can tell there’s an archer there and holding the bow that the arrow rests on, but they become secondary to the broadhead.
Great Depth of Field
If you’ve used auto settings on your camera or used your phone’s camera, chances are it was giving you the greatest depth of field possible.

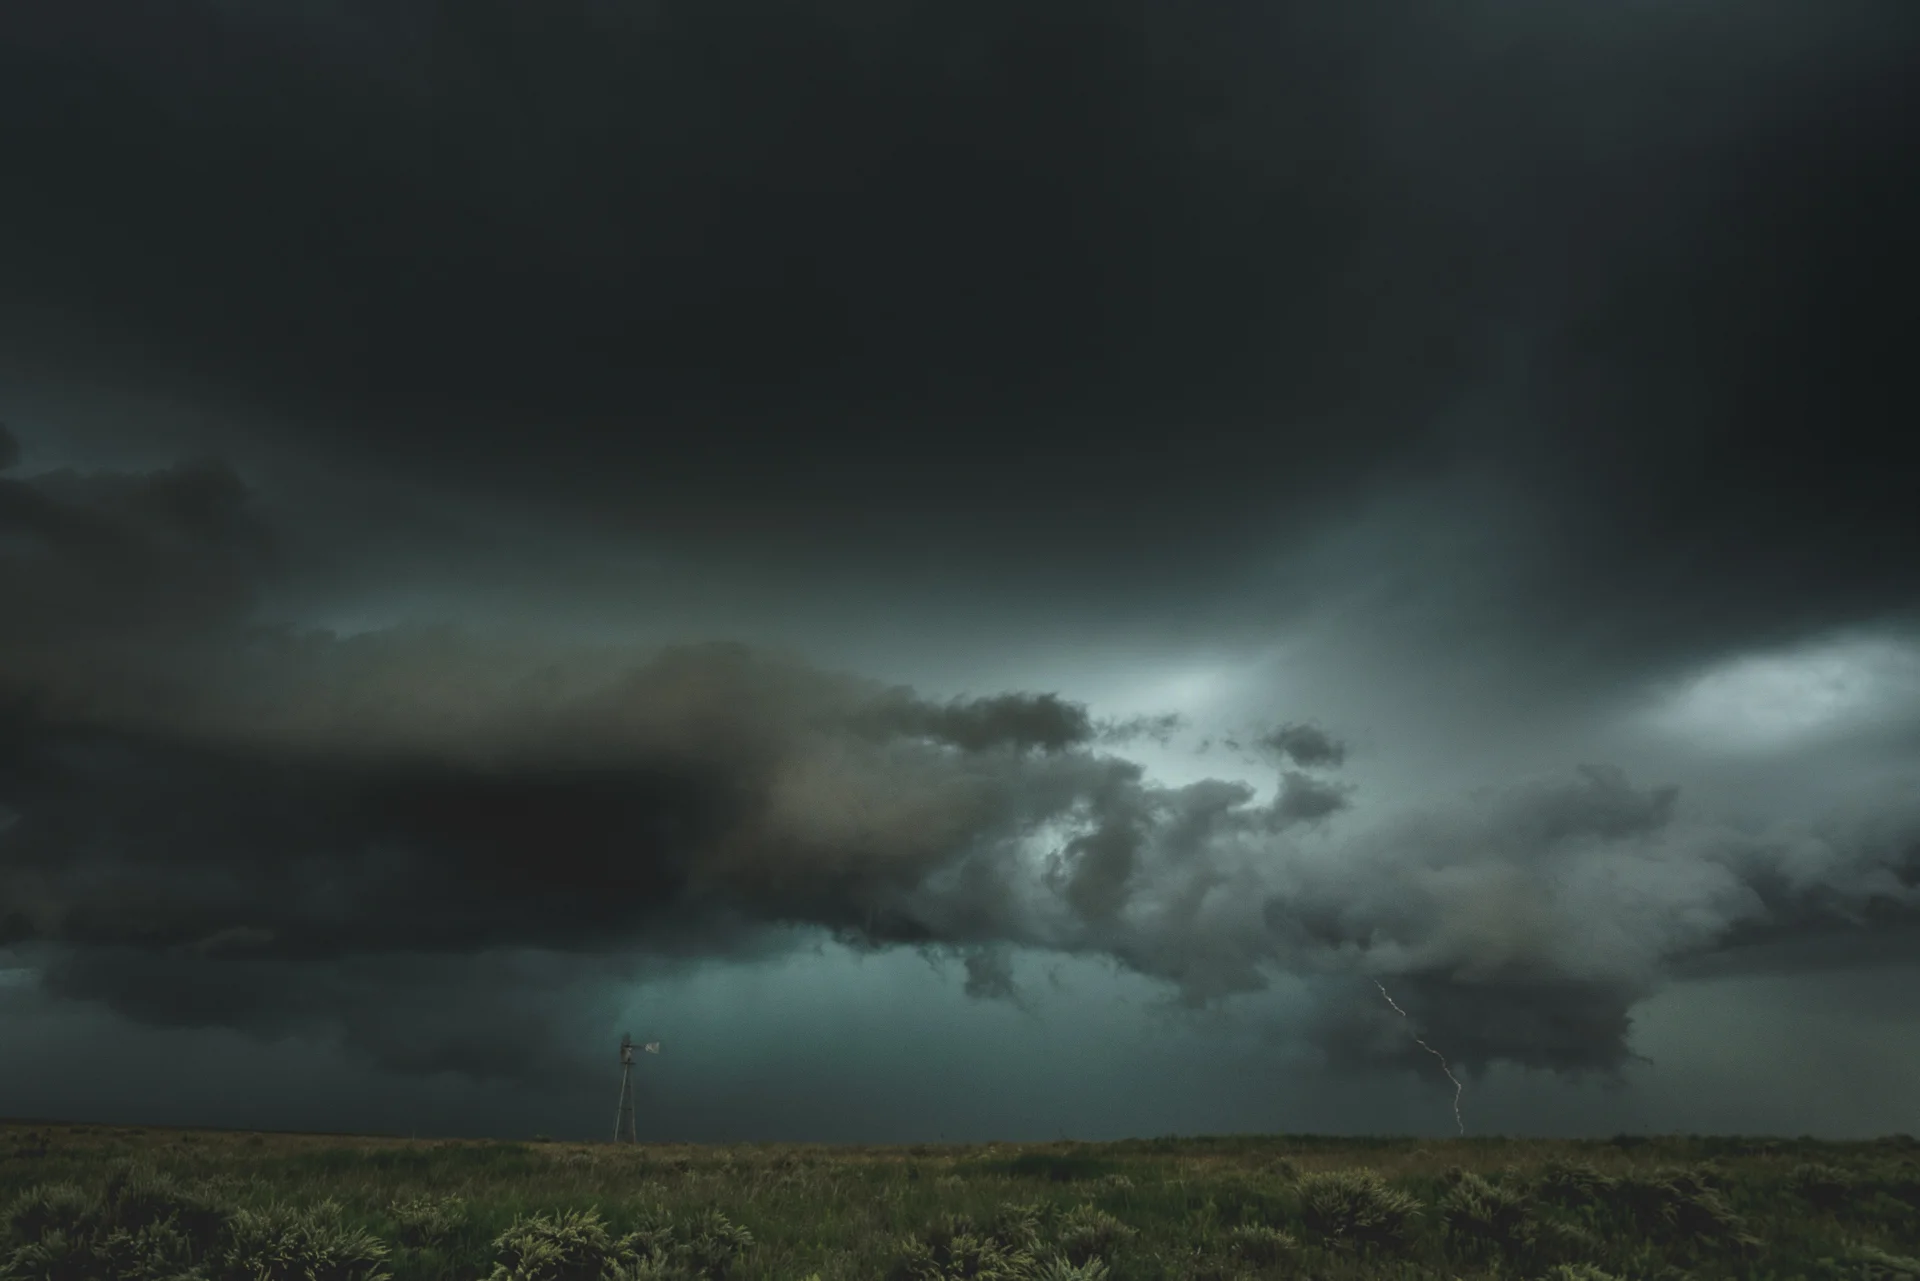
Great depth of field lets you soak in everything in the image.
So when do we want everything in the image in focus? How about a landscape shot. You’re not trying to have one particular element compete for the viewer’s attention, rather you want them to sweep across the shot appreciating everything you captured.

The bright colors the subject is wearing as well as his upper body being above the skyline is enough to force the eye where you want it, no need for an extreme shallow depth of field.
Or maybe you have the subject above the skyline and close to the camera using a wide angle lens. The sheer size of him will force the viewers’ eyes to look at him first, thus the background isn’t competing for attention.
How To Create Shallow and Great Depth of Field
Great, we understand why we want it, now how the heck do we get it? As mentioned these tutorials are meant for cameras where you can control almost all of your camera’s settings. You will need to in order to be able to obtain a shallow depth of field.
There are three things that control the exposure of your camera.
Aperture (what we’re interested in for depth of field)
Shutter Speed
ISO
As you change any one of the above, you will need to compensate with the others to get the correct exposure.
But we’re talking about depth of field here so we are going to be talking about aperture. This is one of the main ways we can obtain a shallow depth of field. Focal length and distance the objects are from the camera and from one another come into play as well, but that will be for another day.
Aperture or f-stop is what controls the amount of light that the iris in your camera’s lens allows through. The smaller the hole, the greater the depth of field. The more the iris is opened, the shallower. You don’t really need to know this technical side of it, but if you’re a nerd like me you might be curious.
What really matters to you is the f-stop numbers. The smaller the actual number the shallower the depth of field. The bigger the actual number is, the greater the depth of field will be.
Let’s take a typical lens for example. It could range from let’s say f4.0 - f22. The “f” is in there to represent “f-stop”. The numbers are all that really matter.
An f-stop of 4.0 would give you a fairly shallow depth of field like in the picture below.

Using an f-stop of 4.0 for shallow depth of field.
This next picture has a great depth of field and has an f-stop setting of f22.
An f-stop of 22 for a great depth of field.
So as you can see you’ll want to use a shallow or great depth of field depending on what you are trying to accomplish. One isn’t better than the other, they just serve a different purpose.
A good exercise is to get out there and start taking the exact same picture with a shallow depth of field as well as a great depth of field. Don’t change focal length or anything else, just the aperture. What works for that particular image?
You can see the lenses I’m using for my pics on my Camera Gear page.
Find me on Instagram at fredbohm and tag me in your pics. I’d love to see how you’re applying depth of field to your photography!
Continue on to Part 3 - Close Up vs. Wide Angle
// Fred Bohm